How to Install Carved Decor’s Decorative Wood Products
Congratulations on selecting your carved decor! Now that you’ve chosen the style, placement, and type of wood, let’s explore how to install them effectively. This guide outlines the essential tools, materials, and step-by-step instructions for a successful installation.
Carved decor installation process
- Place the decor on the surface to be decorated (door, furniture facade, wall) and mark its position with any marking tool, such as a pencil or painter's tape.
- Apply adhesive to the back side of the decor.
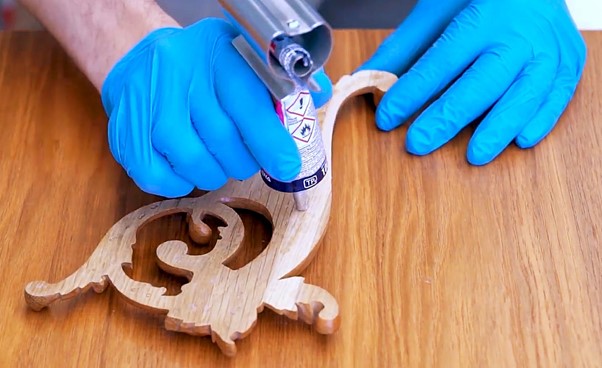
Recommendations for adhesive selection are provided below:
Unpainted decor/unpainted surface of the door, facade, wall:
- Small decor: D4 glue
- Large decor: D4 glue
Primed or painted decor/primed or painted surface of the door, facade, wall; wallpaper:
- Small decor: superglue
- Large (one dimension of the item is greater than 100 mm): silicone adhesive based on rubber for indoor use
- Adhere small decor according to the markings and press firmly for 5-10 seconds.
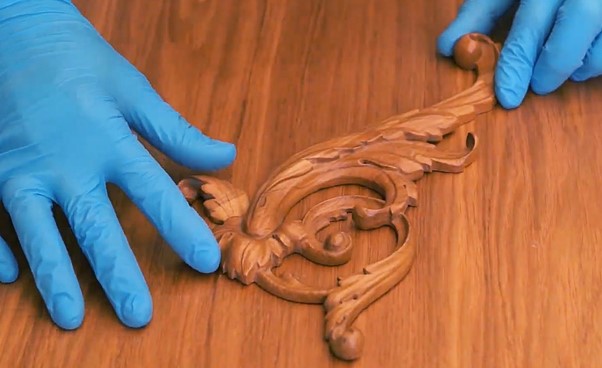
- For large decor, place it on the surface and press for a short time. Then, remove the decor from the surface and let it sit open for 3-5 minutes (this allows the adhesive to air out, improving adhesion). Adhere the decor according to the markings and press firmly for 5-10 seconds.
- If desired, secure the decor using a handheld pin nailer.
Painting and finishing process for decor
- Prepare the decor for finishing: clean its surface from contaminants.
- Matte the surface of the decor.
Matting involves creating a large number of small scratches on the product using abrasive materials. These grooves, which should not exceed tenths of a millimeter in depth, increase the reaction area and improve the adhesion of paints and varnishes. Matting also removes defects acquired during painting, such as raised fibers, dirt, and excess putty.
- Apply a primer (polyurethane) and dry for at least 60 minutes (if using a spray can, dry according to the recommendations on the can). The second layer of primer is optional and is applied at the finisher's discretion based on the opacity of the material. When applying a second layer of primer, intermediate drying and matting are required.
Primers equalize the absorbency of the surface and ensure even distribution of paint without forming spots. The primer mixture fills all roughnesses and irregularities, creating an ideal surface for applying enamels. Additionally, priming significantly reduces paint consumption, as a surface coated with primer has lower absorbency.
- Matte again.
- Apply enamel based on polyurethane or acrylic and dry for at least 240 minutes (if using a spray can, dry according to the recommendations on the can). (In addition to changing the appearance of the product, the enamel increases the wear resistance and moisture resistance of the decor.)
- If desired, apply a spirit-based patina, removing excess from raised areas, and dry for at least 20 minutes.
Patination is the artificial aging of interior items and materials to give them refined decorative qualities, an antique look, and enhanced protective properties.
- Matte.
- Apply acrylic lacquer and dry it for 24 hours (if using a spray can, dry according to the recommendations on the can). If choosing glossy enamel, you may skip applying lacquer.
In addition to changing the appearance of the product, lacquer increases the wear resistance and moisture resistance of the decor, protecting items from prolonged UV exposure.
Transparent coating (for solid wood and paste decor only)
- Prepare the decor for finishing: clean its surface from contaminants.
- Matte.
- Apply a spirit-based stain.
Staining wood enhances color, eliminates color discrepancies in the product, evens out the overall color tone, gives the wood a new color, and simulates the color of valuable species.
- Apply a polyurethane primer and dry for at least 60 minutes.
- Matte again.
- Apply acrylic lacquer and dry for at least 24 hours.
Recommended material suppliers
Paint and varnish materials: SIRCA, RENNER, SAYERLACK
Abrasives: MIRKA.


